
Case study
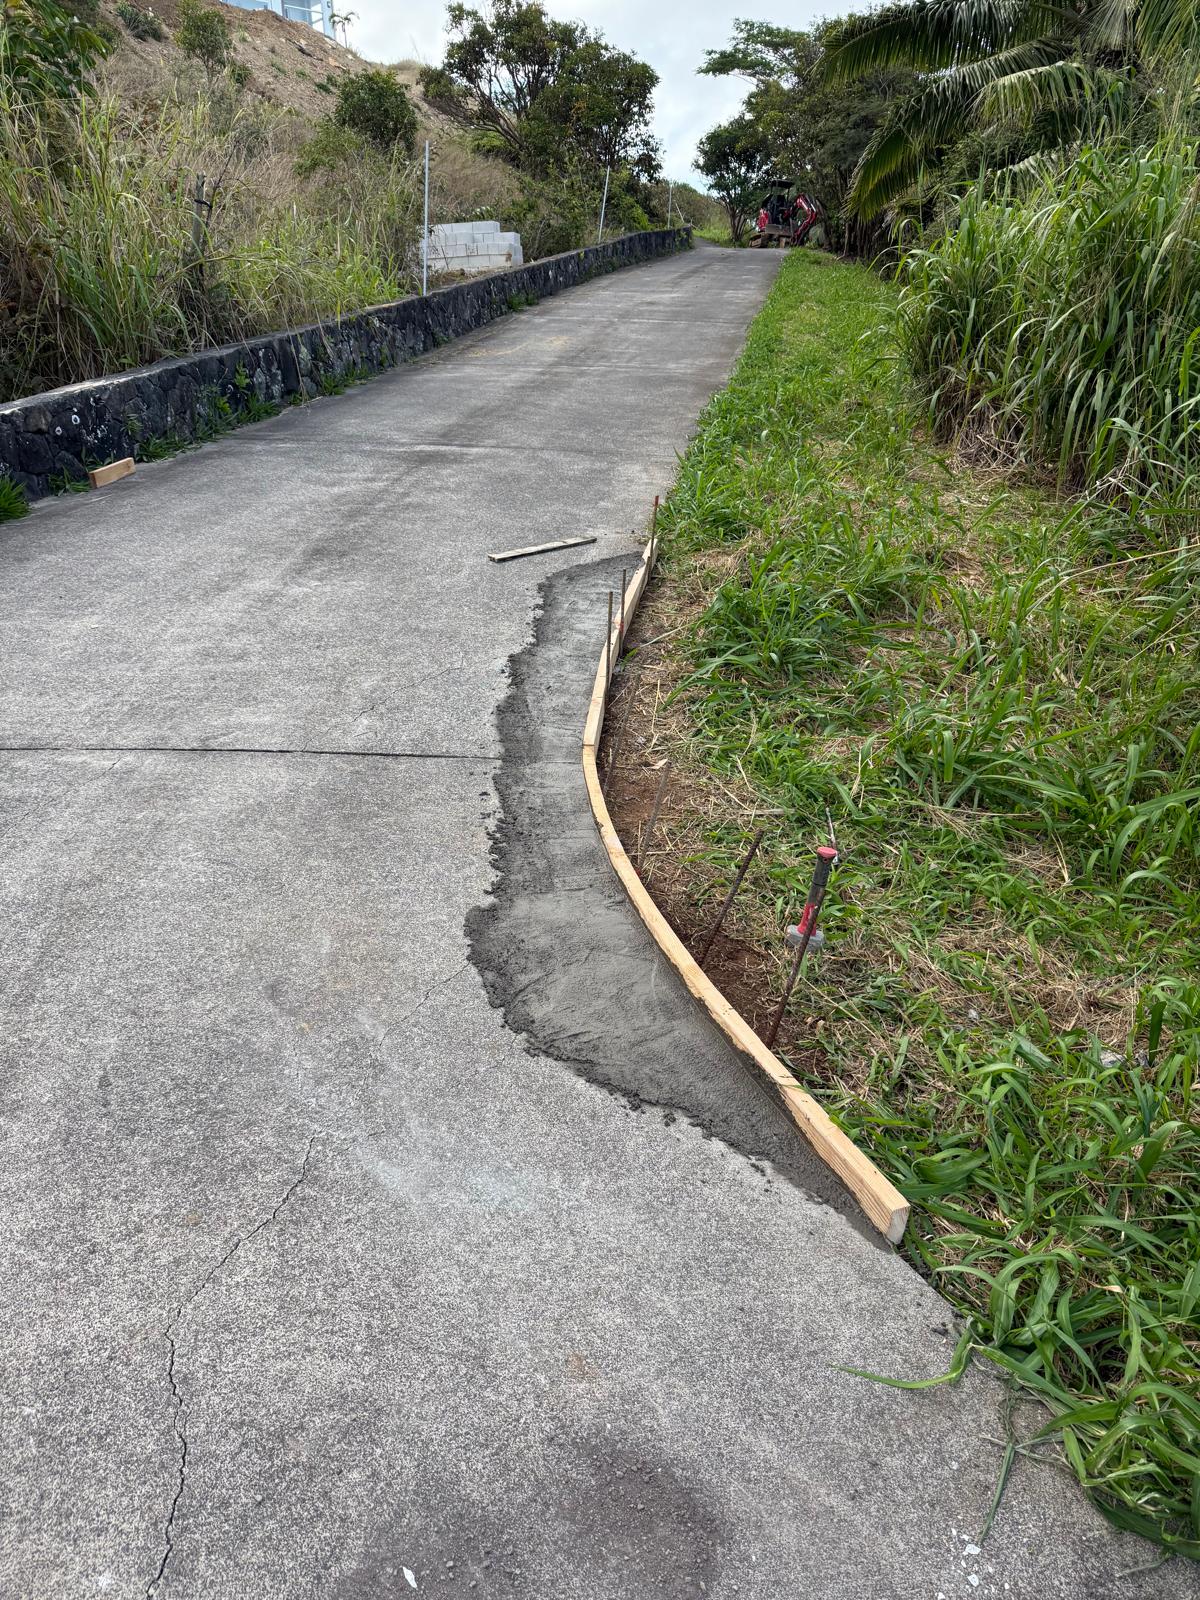
Formed and poured a new curb to hold a crumbling driveway edge
Built wood forms with rebar stakes along a failing driveway edge, sealed the joint, then hand-mixed and poured a new concrete curb finished smooth.
- Location
- Denver
- Crew
- 2 techs
- Completed
- July 2026
Project scope
What we did
The job
The driveway edge had no curb, so every wheel that clipped the side broke off a bit more pavement and pushed it into the grass. We formed a new curb along the curve, sealed the joint against the existing slab and hand-mixed the pour on site so the crew could keep the placement moving in one continuous run.
The problem
The driveway edge was cracking and eroding into the adjacent grass with no curb to contain it.
Our recommendation
Form and pour a monolithic concrete curb along the failing edge, tied to the existing slab with a sealed joint so water can't work between the old and new concrete.
The result
A continuous, level curb following the driveway curve, protecting the edge from further erosion.
Project gallery
Photos from this project
Real job-site photos — tap any image to view it full size.
Why homeowners choose us
Why choose Denver Handy Co.
Skilled & experienced
Years of hands-on experience in remodeling and home improvement.
Quality work guaranteed
We stand behind our work and pay attention to the detail.
On time & on budget
We respect your time and your budget at every step.
Local & trusted
Proudly serving Denver-area homeowners.
Clear communication
Honest updates, responsive service, and no surprises.
What homeowners say
Reviews for driveway concrete curb
We're collecting verified reviews for driveway concrete curb. In the meantime, here's what every job comes with — and why homeowners keep calling us back.
Every job is backed in writing. If our work fails, we come back and make it right.
Two professionals who show up together, on time, and finish what they started.
Tell us how it went — it takes a minute and helps neighbors choose with confidence.
Leave a review →Free estimates · Most projects scheduled within the week.
Keep exploring
Need the same work at your place?
This project pulled from the services below. Each one can be booked on its own or bundled into a single visit.
Home Repairs & General Handyman
Doors, cabinets, trim, hardware, caulking, adjustments, and everyday residential maintenance.
Home Repairs & General Handyman in Denver MetroDenver handyman services
See everything Denver Handy Co. handles in Denver and the surrounding Denver Metro neighborhoods.
Handyman in DenverMore work
Marble-Look Tile Bathroom Refresh
A full bathroom refresh with large-format marble-look tile on the shower walls and floor, a built-in bench, new vanity, mirror and fixtures.
View case studyMore work
Under-Sink Water Filter Installation
Installing an Aquasana Claryum direct-connect under-sink filter: shutting off supply, mounting the housing, tying into the cold line and leak-testing before cleanup.
View case studyMore work
Whole-Home Water Treatment Install
Installing a whole-home water treatment system in a utility room: isolating the main, tying the tank into the copper supply and pressure-testing every joint.
View case studyReady to start?
Let's plan your project
Tell us what you're working on. We'll help you understand the scope, next steps and what it will take to get the job done.